
Fun with Facts Transcript
Welcome
This is Susan C. Anthony speaking, and I welcome you to my workshop for educators, Fun with Facts. In this workshop, I’ll be sharing with you ideas that made my teaching experience a lot more rewarding, and I hope will do the same for you. When kids are learning, teachers tend to enjoy teaching more and give it their best effort, which helps kids learn, which encourages teachers, and there’s a upward spiral that feeds on itself. By contrast, when kids have trouble and get frustrated, teachers are discouraged and sometimes blame or feel badly about themselves, which starts a downward spiral that feeds on itself.
I prepared this workshop is share some ready-to-use ideas that will hopefully get the upward spiral launched for the benefit of both teachers and kids.
This workshop hits the highlights of what I taught over fifteen hours in a credit class for teachers. I obviously can’t cover everything there is to say about this subject in a short hour. And don’t think that I’m recommending that you try all of these activities. Your job while listening is to consider the ideas like you might consider jigsaw puzzle pieces. Look at them. Find one or two that fit with what you’re doing right now. Keep in mind what you might be able to use in the near future. Nobody should use all these ideas in a single year, not even me. Pick and choose. Prioritize as we go along.
About Me
 I should tell you a little about me so you know who’s talking. Notice I’m wearing sunglasses in the photo. For the most part, I do NOT like my pictures and avoid cameras as much as possible. I’m happiest when I’m thinking about ideas, not myself. They say there are three basic types of people: people who love ideas, people who love people, and people who love things (cars or machines, for example). Most people are a combination of all three. I’m an off-the-chart idea person. When it comes to things—fixing machines and the like—I’m hopeless.
I grew up in the Colorado Rockies and rode a bus several miles to a two-room schoolhouse. Mrs. Amy was my first through third grade teacher. I didn’t have access to a library until fourth grade, when someone in the community with a Denver library card would check out books, then lend them to us kids. In 7th grade, I went to school in a bigger town and a teacher gave us an assignment that changed my life. It was just a list of questions. She took us to the library, which was in a janitor’s closet, and instructed us to use the reference books there to find answers to the questions. Along about the time I found the name of the 16th pope, it occurred to me that all the knowledge in the world was available to me in books, if I just knew where to look. That gave me a sense of power!
I wanted to pass along that insight to my own students. I ordered a class set of world almanacs for my 6th grade students in the Anchorage School District and began developing activities. Almanacs were perfect because they had maps as well as a wide variety of information, all in one volume. Each of my students kept an almanac in his/her desk. The kids soon began pulling them out and looking things up whenever someone asked a good question in a class discussion or when there was an interesting news event. Reference books became an integral part of our classroom as well as the kids’ lives.
When I moved from 6th to 5th grade, I tried to use the same activities, but World Almanacs gave the younger kids trouble. The typeface was too small, there were decimals and other things they didn’t yet understand, they had trouble finding the information they wanted in charts and tables overloaded with information they didn’t want. The activities were still great, and the kids were doing their best. The problem was the almanac itself. I needed a more kid-friendly almanac. I looked around but found nothing I liked. A friend encouraged me to write the book myself, and I did. It took seven years from idea to final product, but it was worth it.
 I attended a lot of classes during my teaching career and took a lot of notes on a lot of great ideas that I never used because I didn’t have time to make up the materials I needed to do the activities. I didn’t want to do that to you. This is the kids almanac I wrote, Facts Plus. It’s packed full of basic information, what I call essential information, that educated people should know or at least be familiar with.
I liked using almanacs in the classroom as well as posting maps, time lines and the like, because I could be flexible and quickly respond to kids’ sparks of interest. For example, one day during math, one of my 4th graders raised his hand. He’d been thinking. He said, “You told us last week that the wiggly state borders are rivers. I’ve been wondering what river is the border between Idaho and Montana."
In my earlier days of teaching, I might have directed him back to math, but I was ready to capture and exploit that question on the spur of the moment. I went to the map to find out and in the process learned something I even didn’t know I didn’t know. What river is it?
Well, it’s not a river. It’s the continental divide, which is a natural feature and therefore wiggly. In a few seconds, we were back to math. Everyone had learned something new, including me.
 The activities I used with almanacs are in the Facts Plus Activity Book, including those I’ll share in the coming hour. Many of the activities I had used with the World Almanacs years before Facts Plus existed. They’re generic ideas, but the answers in this Activity Book are keyed to Facts Plus. Everything you need to do the activities is in these two books but be creative. Extend and expand them to incorporate other reference resources you have available.
Objectives
Hopefully during this short hour, you will:
- Memorize the five basic ways to organize information.
- Learn how to organize a learning environment to capture and exploit "sparks" of students interest.
- Go home with at least one idea you actually use.
I’d appreciate you letting me know which ideas you actually use, what ideas worked for you and your kids. Send me an e-mail at Susan@SusanCAnthony.com. Knowing that something worked for you is encouraging to me.
Handouts
A handout is available to download on my web site. The first page lists the five basic ways of organizing information that I want you to memorize, and ideas for organizing your classroom or learning environment using them as a theme. (If you don’t memorize them, the handout can be your cheat sheet.)
The handout also includes ready-to-use activities from the Facts Plus Activity Book. The activities can be used with any reference resource, including the Internet. Here, for example, are two timelines. The one on the left is a time line of major events in western history from 5000 B.C. to the present. I’ll talk more about how to use this a little later. On the right is a blank master that can be used to create vertical time lines. I’ll talk more about them later, as well.
Here’s a ready-to-use space activity I’ll be showing you late. Just a note about this. Pluto is no longer a planet. It’s now called a dwarf planet and in fact is not even the largest dwarf planet. It was demoted in part because of the 2005 discovery of Eris, an object in the outer solar system that is 27% more massive than Pluto. Ceres, the largest asteroid, is also now called a dwarf planet. Some astronomers still think Eris should have been promoted to planet, rather than Pluto demoted to dwarf planet.
It took me seven years to finish Facts Plus in part because things kept changing. I thought a fact was a fact, but sources conflicted with one another. One example was Betelgeuse, the eighth brightest star in the sky. Depending on which source I used, it was anywhere between 300 and 600 light years from earth. That’s not a small difference! There’s really no way I can go out and measure that for myself! I finally chose what seemed to be the most consistently correct source, The World Book Encyclopedia, and cited it. I can’t guarantee all the facts in my books are correct, but I did my best. I used to love facts because I thought they were solid. I learned they aren’t as solid as I thought. One year the Statistical Abstract reported Michigan as the 26th largest state, the next year it was the 10th largest state. What’s up with that? It drove me crazy so I called around until I found the person responsible for that chart. He hemmed and hawed, then told me they now counted inland water as part of a state’s area.
But I digress.
Why Reference Books?
Well, for one thing, I like books. We should perhaps use the term reference resources, which include the Internet. Kids need to learn about reference resources because:
- Facts are building blocks for thinking.
- Memories are limited.
- Information is growing exponentially.
- General knowledge is often adequate.
- Facts can be fun!
Some educators seem to think “fact” is a four-letter word. I was criticized for emphasizing facts and memorization in my classroom. I was supposed to teach kids how to think, I was told, not bore them with facts.
One of my fourth graders came in one day astonished that a child in her Boy’s and Girl’s Club the previous afternoon had looked at a map of Alaska and identified the Alexander Archipelago (Alaska’s panhandle) as Florida. She couldn’t believe he could be so ignorant. He was a year older than her. I told the class that some people would criticize me for teaching them so many facts. She was even more astonished! “Well, what ARE we supposed to learn in school, then?” she asked.
In truth, facts help kids think. They are building blocks for thinking. People don’t think in a vacuum. They need something to think about and something to think with. At certain stages of development, kids’ minds soak up facts like sponges. In my experience, that’s about fourth grade for most kids. I struggled all year to get sixth graders to memorize the names of the continents and oceans. Fourth graders learned that in a few weeks and went on learn a lot more. Some 4th graders even memorized the names and locations of every country in the world, by choice.
Readiness has to do with how the brain develops. At different ages, different areas of the brain physically “firm up” or become myelinated. Until that happens, you may beat your head against a wall trying to teach things kids’ brains aren’t ready to learn. At certain points, kids make huge strides in certain areas. If the optimum time for learning a certain thing passes, they can still learn it, but it will take a bit more work.
Another reason reference books and resources are important is that human memories are limited. Boy am I ever noticing that as I age! I wish I could plug in a few more terabytes of RAM! I keep seeing a flashing message telling me my memory is almost full and I need to delete something before the whole system crashes! We need to prioritize what needs to be committed to memory, as distinct from what we can easily look up.
A third reason for using reference resources is that information is growing exponentially. I read a book in the early 1990s entitled Information Anxiety that claimed the sum total of available information in the world was doubling every five years. That means in the 25+ years since then, humans accumulated sixteen times as much information available to learn. 1992 was before the Internet caught on. The news is probably worse now. When I was a kid, it was possible to aspire to know a lot bigger percentage of knowledge than it is now. The ability to use reference extends our capacity to know. Why memorize the population of Wyoming when it's easy to look up and next year it will change?
A fourth reason for learning to use reference resources is that general information about a subject is often adequate in day-to-day life. If we know how to find specific information when and where we need it, we’ll do fine.
And a last reason, facts can be fun. Some kids love facts, especially boys and often kids who aren’t great readers. A mom wrote me once to order a new copy of Facts Plus because her son had been sleeping with it and it looked like an old telephone book. For him, facts were key to getting him enthused about learning.
My Overall Objectives
I sat down one day and thought, “What are the three most important things I want kids to gain from being in my classroom?” These are my answers. If nothing else, I want to:
- Nurture the excitement of learning.
- Build confidence through early success.
- Build a framework of knowledge and skills to which new learning can be connected throughout life.
We'll talk about each of these separately.
Nurture the Excitement of Learning
First, nurture the excitement of learning. Most kids start kindergarten VERY excited about learning. By the time they finish 6th grade, that has often faded. How can we keep it going?
One way is by setting things up to take full advantage of any sparks of interest they show, rather than relying totally on a curriculum. Kids can learn a lot amazingly fast when they’re interested. There’s too much to teach to rely totally on their interest, but when they are interested, be ready to take full advantage of it.
This is where it helps to have a long-range perspective. If you are clear about what you want kids to know in the long run, you can set aside the formal curriculum when they suddenly become interested in something, harness their interest to make tracks, and come back to the curriculum later.
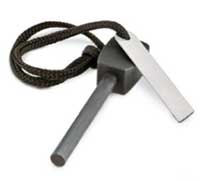 My husband gave me a magnesium flint starter thing awhile ago so that if I ever get lost in the woods, I can build a fire and survive. It’s weatherproof and generates sparks 5,000° hot. Here are directions for using it: “Hold the fire starter so that the tip is pressing on the ground near dry grass, leaves, moss, cloth, dryer lint, paper, etc. Place the blade on the flint at a 45-degree angle (perpendicular to the flint) and scrape in a downward motion.”
Notice that you need something other than just the fire starter. You need something to catch the sparks: flammable material, dry grass, leaves, moss, etc. To utilize this thing, we usually build a sort of “nest” to receive the sparks. It might consist of tiny twigs, then dry grass, then maybe a piece of cotton soaked with Vaseline from our survival kit. When sparks hit the “nest,” they ignite. You nurture the flame and gradually add fuel until it’s roaring and can keep you warm.
This is an analogy. As a teacher, you want to prepare a place for the sparks of your kids’ interest to fall, then watch and wait for sparks. Set up your classroom or learning environment to do that.
Here's an example of Calvin generating some of the kinds of "sparks" I'm talking about:
Calvin: Why does the sun set?
Dad: It's because hot air rises. The sun's hot in the middle of the day, so it rises high in the sky. In the evening then, it cools down and sets.
Calvin: Why does it go from east to west?
Dad: Solar wind.
Mom (offstage): DEAR!
Calvin: Why does the sky turn red as the sun sets?
Dad: That's all the oxygen in the atmosphere catching fire.
Calvin: Where does the sun go when it sets?
Dad: The sun sets in the west. In Arizona, actually, near Flagstaff.
Calvin: Don't the people get burned up?
Dad: No, the sun goes out as it sets. That's why it's dark at night.
Calvin: Doesn't the sun crush the whole state when it lands?
Dad: Ha, ha, of course not. Hold a quarter up. See, the sun's just about the same size.
Calvin: I thought I read that the sun was really big.
Dad: You can't believe everything you read, I'm afraid.
Calvin: So how does the sun rise in the east if it lands in Arizona each night?
Dad: Well, time for bed.
Calvin: I hope someday I'm as smart as Dad is.
Mom (tucking Calvin into bed): Why, what did he tell you now?
Calvin’s curious questions are "sparks" his parents or teachers could use to start a fire. If you think about it, you have no choice but to spend some of your time rowing against the current when you teach kids. Other times you row because you’re in the doldrums. When you feel a breeze, hoist a sail and take a break from hard labor. When kids’ interests fuel the educational process, the big problem becomes keeping up with them let alone ahead of them. If you’ve ever been sailing, you might know how it feels to have too much sail in a strong wind. It’s scary.
Build Confidence through Early Success
My second objective was to build confidence through early success.
There’s been a lot of talk in the culture about “self-esteem” but I guarantee you, self-confidence is better than self-esteem. Self-esteem means thinking highly of yourself. Criminals have high self-esteem. They think they were born superior to the people they rob or assault. Synonyms for “self-esteem” include pride, arrogance, narcissism, and so on.
Self-confidence, by contrast, means being confident that whatever life throws at you, you can take it on, figure it out, deal with it, and emerge victorious. It’s based on the experience of having faced tough situations and conquered them. I wanted my students to gain self-confidence. From confidence, in my opinion, comes whatever is good about self-esteem.
To build self-confidence, you need to be especially careful to plan first lessons about anything. First lessons are like first impressions. You never get a second chance to make a first impression. If the first time kids are exposed to fractions, for example, they succeed, they’ll think, “This isn’t hard. I can learn this.” From that thought comes success.
By the way, most kids (and actually people of any age) need about 90% success to feel good about themselves and be encouraged to keep trying. Some people can do with less than that, but for the most part, people need nine successes for every failure or they will want to disengage and do something else that makes them feel better about themselves. 90% is a lot. If kids have less success than that in a first lesson, they will think, “This is hard,” and they’ll dread coming back to it. So take time to really plan your first lessons in any new area of study. After the first few lessons, you can be a little more flexible.
It used to discourage me when kids would whine, “I can’t.” Then it hit me. Of course they can’t. If they could, I wouldn’t need to teach them. They’d already be able to do it. So I tell kids, “I know you can’t. My job is to change that so you can. Bear with me. You’ll feel great when you learn to do something you couldn’t do before.”
I have a personal story about confidence and early success. My husband and I were at our Alaska homestead one winter and a blizzard outside roared for days. We were stuck inside. For awhile, it was great. I always bring books to read and I rarely have time to read a book cover to cover in regular life. The blizzard and below-zero temperatures continued day after day after day. Even I started to get a little cabin fever. My husband suggested we play chess.
This may be hard for you to believe, but I was in my mid-30s and had never played chess. Not ever. Dennis, by contrast, had played most of his life and sponsored a chess club when he was teaching. He taught me what the pieces were and how they had to move. I struggled along with his help. Pretty soon, I started to think of good moves on my own. It felt great. But when he noticed I was doing pretty well, well, he had wanted to play chess from the beginning, not teach me to play. He started playing, knocking my pieces off the board with glee. I’m an adult, but I wanted to cry. I must confess that I have never played chess since. Early success makes a huge difference for everyone in how much effort they’re willing to put into learning something new.
Build a framework of knowledge and skills to which new learning can be connected throughout life
My third objective, you might remember, was to build a framework in my students’ minds to which new information could be added throughout life.
Disorganized knowledge can impede learning. I once heard a definition of an “educated person” as someone to which anything new they encounter can be related to something they already know. That made me think about how I process new information. The first thing I do is relate it to what I already know. In the chess example, I related chess to checkers, which I already knew, and noted what was the same and what was different.
 Think about the incredible store of knowledge in a room full of filing cabinets. Then picture all those documents strewn on the floor, all mixed together. The same amount of information is there, organized or disorganized, but accessing it is a whole lot harder when it’s disorganized. It can be well-nigh impossible.
When I started school, my brain was rather empty. It was kind of like a fallow field, ready to be sown with facts and ideas. By contrast, kids today have been exposed to a tremendous amount of information by the time they start school. There is a lot in their brains, but it’s scattered, disorganized and hard to retrieve. Which is better? I think it’s probably better to have an empty brain ready to learn than a brain full of disorganized information. Disorganized knowledge can be a liability and actually impede a person’s ability to think and learn.
Learning involves retrieval as well as storage. Having a fact in your brain somewhere but not being able to find it when you need it is almost worse than not having it to start with! An analogy might be a house full of junk. As far as organization is concerned, it’s almost easier to start with an empty house than to start with a house full of junk! With a empty house, there’s no backlog. You can deal with things one at a time.
The more ways new knowledge can be connected to what a person already knows, the easier it is to access it. Think about seeing someone at a grocery story that you recognize. Your mind goes into action trying to figure out who it is. It searches people from work, people from church, your kids’ friends’ parents, your friends’ friends, on and on until it gets a hit. You might not even be conscious of the search as you continue shopping, but at some point, you may think, “I know who that is!” The more connections, the faster the search. Make it an objective to help your kids connect new knowledge to what they already know in as many ways as you can. We’ll talk more about how to do that in this workshop.
People often assume that other people “already know” what they “already know” because their “background information” is, by definition, in the background. Nothing could be further from the truth. Others may not have the same background information we do. One of the purposes of education is to transfer to new generations the background information shared by older people in their culture.
The background information that a person brings to anything he reads or hears makes a huge difference in his comprehension. For example, I might say to you, “Last winter I took a vacation to Baja.” Notice what you think. What comes to mind?
For most people, it’s a long skinny peninsula, but for you, depending on your background, it might include memories from a cruise you took, a fishing charter, whales, a drive in the desert, a documentary you viewed, anything you personally know about Baja. If you speak Spanish, you might recall that “Baja” means “low” or “below” and that “Baja California” is below California.
That’s an example of “background information.” Your kids don’t necessarily have the background information you have. You need to develop their fund of background information.
Think again of a filing cabinet. As teachers, you may have a real filing cabinet, with drawers labeled “Reading”, “Spelling”, “Math” “Social Studies”, “Science” and so on. As you come across things you might want to use someday, you put them in the drawer. Once you have a lot of stuff, you further organize the science stuff into categories like “biology”, “chemistry”, “geology” and so forth. You might think of those categories as labels on Pendaflex folders. When you have a lot of stuff in the Pendaflex folder “biology”, you might create sub-folders such as “botany” and “zoology”.
Building a framework to which new knowledge can be connected throughout life means creating in your students’ minds a sort of “filing cabinet” with labeled drawers and folders. The drawers and folders may be empty, but they provide a place to put information as it’s learned.
In the old days, when I was a kid, I had lots of time for reflection, lots of time for my mind to chew on, organize and connect what I learned. Now that’s not the case. Everything comes at us so fast. Teachers now need to make a concerted effort to help kids connect what they’re learning to what they already know. Otherwise, their minds will be like a filing cabinet with documents scattered all over the place and mixed, leaving them no easy way to retrieve anything.
Classroom Setup
Now I want to talk about classroom setup. How can you organize your learning environment in such a way that it’s ready to capture the sparks of kids’ questions and interests.
I was amazed to learn that there are five, and only five, basic ways to organize information. Try now to list as many of them as you can. I’ll pause to give you a little time to think. ... Here they are. Information can be organized:
- Alphabetically
- By time
- By place
- By category
- By continuum
- Alphabetical. Almost everybody lists alphabetical organization. Think of a few reference resources that are organized alphabetically. (Dictionary, encyclopedia, telephone book, index.)
- By time. More books than you immediately think of are organized by time, including fiction. Fictional stories start at a point in time and go through a middle to an end with events ordered by time. Even when a book begins with a flashback to a situation at the end, it is basically organized according to time. What else is organized by time? You might think of history books, chronicles, time lines.
- By place. What reference resources are organized by place? You might think of maps, atlases, and travel guides. Social studies texts are often organized by place as well.
- By category. How about category? Yellow pages are an example. They break down businesses according to category and then alphabetize within categories. Almanacs are organized by category, as are cookbooks.
- By continuum. The last way of organizing information is by continuum. You might have listed numerical, basically the same thing. Race scores are organized by continuum, with the fastest runner at the top and the slowest runner at the bottom. Another example might be a list of kids in a group arranged from oldest to youngest.
There’s a great old story about a man named Abdul Kassem Ismael, the scholarly grand-vizier of Persia in the tenth century. He had a library of 117,000 handwritten books, each extremely valuable. Remember that movable type wasn’t invented until the 1400s so books had to be hand-copied. When Abdul Kassem Ismael traveled as a warrior and statesman, he took all of his books with him. They were carried by 400 camels, trained to walk in alphabetical order. His camel-driver librarians could put their hands instantly on any book their master requested. His books were organized. The information in them was accessible.
I can’t emphasize too strongly the value of having information organized.
How you choose to organize information is important. There's a Frank and Ernest cartoon where the boss is saying, "To avoid confusion, we decided to rearrange the streets alphabetically." The chart says "Fifth Street, First Street, Fourth Street, Second Street, Sixth Street, Third Street."
I used these five basic ways to organize information to organize my classroom and set it up to catch sparks of student interest and enthusiasm.
- Alphabet cards
- Time line (5000 B.C. to A.D. 2050)
- Maps of the world, U.S., your state
- Color-code categories
- Number line
Here's how I did it:
- Alphabet. I posted a set of handwriting alphabet cards. This not only helped kids remember how to form the letters when writing, it helped them when we learned to alphabetize and to use indexes and dictionaries. The kids could glance up to check whether P comes before or after R, for example.
- Time. For time, I posted a large time line that extended one whole wall. It started at about 5000 B.C., when prehistory turned into history, and extends to A.D. 2050, a few years from now. It’s labeled in increments of 500 years and I used National Geographic photos to illustrate an outline of major periods and events: Ancient Egypt, Ancient Greece, Ancient Rome, Birth of Christ, Middle Ages, Columbus and U.S.A. began. I’ll talk more about how I used this a bit later.
- Place. Posting maps was a big breakthrough in my teaching career. One reason I wanted to be a teacher when I was a kid was I loved doing bulletin boards. When I became a teacher, bulletin boards became the bane of my life until I decided the kids should have maps in front of them all the time. That took most of my bulletin board space, leaving only one or two that needed to be changed and refreshed. We used them on an almost daily basis, and the kids learned to connect everything they learned to a map. I posted a very large map of the world, a large map of the United States, and a huge map of Alaska before school began and didn’t take them down until school ended. It might be a good idea to post a large map of Europe as well, because all the countries are so small.
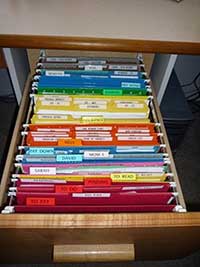
- Category. The difference between category and continuum is a little confusing to most people. Think of category as organizing by color and continuum as organizing by number. One way I used category was to color-code school subjects. Reading was red, Spelling was yellow, math was blue, etc. The kids each had colored pocket folders in which I taught them to keep all related paperwork. Kids aren’t naturally organized. Have you noticed? Even adults aren’t naturally organized, and a huge amount of everyone’s time gets wasted as a consequence. Take time when kids are young to train them how to organize their stuff. That alone might make a huge difference over their lifetime, and their future spouses will thank you.
- Continuum. For continuum, I posted a huge number line extending from 0 to 1000. We used it when appropriate, often in math. When it comes to rounding, it’s easier to see which hundred or thousand is closest than it is to conceptualize it.
I also kept as many reference books in my classroom as I could. I borrowed a class set of dictionaries when I taught about dictionaries. Each child had an almanac in his/her desk, a World Almanac until I wrote my kids’ almanac, Facts Plus. I had thesauri (you might say thesauruses but it’s a Latin word so thesauri is the correct way to pluralize).
One year, The World Book had a great incentive program for kids’ reading. Kids gathered sponsors and pledged to read books. The World Book matched the money the kids raised. My 4th graders earned a copy of just about everything World Book publishes: a set of World Book encyclopedias, Childcraft, atlases, dictionaries, and so on. It’s great to have those basic reference books right at your fingertips, and they don’t need to be the latest edition. These days, of course, most people look to the Internet, but let me just put a word in for World Book. You can’t trust everything you read on the Internet.
Our granddaughter’s teacher had a huge globe in the classroom the first year we went through the Panama Canal. I remember how big her eyes got when I showed her where we would be traveling on that globe. Years later, she went with us on the same trip in the opposite direction. I think every learning environment should have at least one globe. Our school had a classroom set of identical globes and I did lots of instruction with them.
Other reference resources to have around and teach kids to use include calendars, telephone books, cookbooks and catalogs.
1. Alphabet Activities
Here’s how I taught kids the dictionary and alphabetical order. It was a popular activity, and fun for everyone.
I borrowed an identical set of dictionaries from a library, enough for me and every one of my students.
The first day I just let kids survey and explore. Dictionaries have a lot of interesting information before and after the main section that a lot of people don’t know about. I asked kids to find and tell me what they found in the dictionary besides words and definitions.
The next day, I name a letter, any letter. Students locate any page that has words beginning with that letter. This is easier with tabbed dictionaries, of course. If they’re not tabbed, kids find the letter by determining about how far along it is in the alphabet (first third, second third, or third third). Open the dictionary about where you guess it might be. Look at the posted alphabet cards to see if you should move backward or forward to find the letter you want, then “zero in” on the letter by moving backward or forward again and again until you have guide words starting with the letter you’re seeking.
When kids get good at that, I open my dictionary and write one guide word on the board (or say it if it’s easy to spell). They are to find the page with that guide word as quickly as possible. Once they find the page, they raise their hand. We continue this activity for a few minutes each day until kids are competent and fast. Whiz kids can coach and encourage classmates.
The next step is to have them find the page with a guide word as before, then find a word on that page that is not a guide word. Again, they learn to guess about where they think it might be, check the alphabet cards to see if they need to look before or after the word in front of them, and “zero in” on the target.
When kids are good at that, the teacher can write any word from the dictionary on the board. Kids race to find the word. Don’t call on the first student who finds it but acknowledge that child nonverbally. Give other kids time to find it and when most are done, ask the first child (or anyone else) to tell you the page and the column the word is in.
The final activity is “Ten Words in Ten Minutes.”
Kids each get a piece of paper like this. The teacher says, “Ready, Set, Go” and kids find each word and write the page and column number. They note how much time it took. When they find ten words correctly in ten minutes, they “pass.” I award them for reaching a mastery standard. The fastest students then go on to better their times. If there's time left after they finish their worksheet, they can encourage and help other kids who find this exercise more difficult.
Eventually, almost every child could locate ten words in ten minutes in the dictionary and win an award.
I think it’s important to set objective but reasonable standards for children to strive toward. Even kids who don’t reach the standard (and most do) will do much better than they would have without a standard. If a child doesn’t reach the standard by the time we move on, I call them aside and tell them my objective was that they learn to do find words in the dictionary. Being able to find them fast was secondary. Even if they didn’t finish in 10 minutes, they DID know how to find words in the dictionary and I am proud of them. Everybody’s different. The ten minutes thing is just a game. Even kids who didn’t reach the standard, and they were rare, knew that they knew how to do this. That’s what I really wanted.
2. Time
I already mentioned that I post a big timeline on the wall, extending from 5000 B.C. to A.D. 2050. Early in the school year, I do an overview of the timeline, acquainting them broadly with the march of world history. I have visited the Pyramids and Greece, so I show my slides. They often get really excited and bring books and videos from home. One teacher told me she tried this and the kids got so excited about it that she had to put the rest of her social studies program on hold for awhile. The kids were learning so much she couldn’t keep up with them. That’s a good problem to have. Whenever possible, you want KIDS providing the energy. Sometimes you end up hanging on for dear life but that’s preferable than having to push them to get moving.
I wanted kids to commit to MEMORY the time line, so they could visualize it in their minds long after they left my classroom. I tested them, week after week, using the exact same test, the time line that’s in the handout. Keep in mind that all they had to do was look up at the big time line on the wall to get a perfect score. I challenged them to fill it in without looking and most of them accepted the challenge. I didn’t record anything but their best score.
A breakthrough in my teaching career came when I realized I could use the same test week after week if it was something I REALLY wanted kids to know. It’s OK to let them try and try again until they get something right.
The time line became an integral part of my classroom. I remember hosting a guest speaker once who talked about something that happened in 1608. All the kids looked up at the time line to fit what he was saying into the context of what they already knew about world history.
You’ll do kids a huge favor by guiding them in the process of connecting new learning to what they already know in as many ways as you can think of. In this hurry up, rush-rush world, there’s not time to let information and ideas “cook” or organize themselves gradually.
 Here’s the test I mentioned, the one I gave week after week. On top they wrote the numbers, 5000 B.C., 4500 B.C. etc. B.C. means “before Christ.” Notice that we count time backwards from the birth of Christ. Also notice there’s no year 0. In fact, when the calendar we use was created, people didn’t know exactly when Christ was born, so they just guessed. Turns out they were off by a few years.
A.D. means anno domini, which is Latin for “in the year of our Lord”. (Anno is related to the word annual).
Some people who do not believe in Christ prefer B.C.E. meaning “before the common era” and C.E. meaning “common era”.
Where the spaces below are attached to the time line, as at 1 A.D. and the last two, the event happened on a specific date. Where they are not connected, they happened over the period of time the space stretches.
So the first space below the time line represents the time of Ancient Egypt. The next space represents Ancient Greece, and the next Ancient Rome. Christ was born during the time of Ancient Rome. A way to help kids remember this is the three ancient kingdoms, just by coincidence, are in alphabetical order, Egypt, Greece, Rome.
The only other era on this time line is the Middle Ages, castles and kings. Then there’s 1492, when Columbus sailed the ocean blue. The last event on the timeline is "USA began". I have kids memorize the date, July 4, 1776.
In effect, this timeline gives kids labels for drawers in their mental file cabinet. As they learn new information, have them practice finding the right “drawer” in which to file it, then give them opportunities to retrieve it and refile it until they either know it or know exactly where to find it.
3. Place
You also want them to connect what they learn to a place when appropriate.
This is where big maps come in, of the world, the United States, and your state at least. No matter what they read, learn, or see, if there’s a place involved, find it on a map. This includes television programs, movies, documentaries, fiction, everything. Adults do this automatically and often assume kids do, too, but geographic literacy is far poorer than it once was because geography is not taught as it once was. There’s a college professor who doesn’t pass his students until they draw a map of the entire world from memory. Some of my 4th graders challenged themselves to learn the names of every country in the world, though I didn’t require that. The kids in my 4th grade classroom couldn’t get enough of maps.
The 5-minutes a day thing mentioned on the slide usually happened for me during times when kids were moving around, getting ready or coming in from recess, getting settled after lunch, etc. I’d stand at the world map and say, “Does anyone know the name of this continent?” (pointing to it) North America. Yes. Everybody say North America. How about this continent? South America. Everybody say South America. What’s this one again? North America. This one? South America. What about this one? and so on until they’ve heard and correctly pronounced the names of all seven continents.
The next day in a similar “getting settled” time, we review. I point to the continent, they say the name if they know it. I say the name and they all repeat after me. On to the next, back to the first, on and on until kids are settled and ready for a regular lesson.
The next week, we add oceans, and every week a few more places, always reviewing the ones learned before.
When they know a lot of place names, we do a map game, which I’ll show you in a minute.
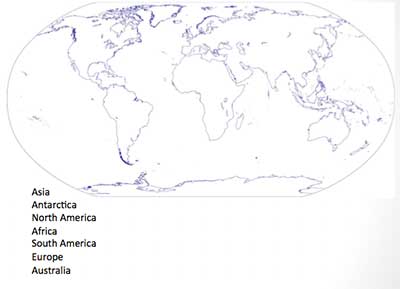 Here’s their test for the first week. Their job is to label the continents, correctly spelled. It’s half off if they don’t spell them correctly because all they have to do is copy the spellings that are right in front of them. No excuses!
The second week, they have to label the continents and the oceans. Interestingly, some of my sixth graders never mastered continents and oceans despite my best efforts, while all 4th graders did and were hungry for more. It has to do with readiness and the brain’s “firming up” in certain areas at certain times. Kids are more open to some kinds of learning at one stage than at another.
The third week I just added a couple more things (Sahara Desert, Greenland, Atacama Desert), because continents and oceans are so important. I taught them the Atacama Desert, which is in northern Chile, partly because not many people know about it though it’s the driest place in the world, with no rain for 400 years. Kids who like facts love knowing things other people don’t know.
We continued with major rivers like the Nile, Mississippi, Amazon, major mountain ranges, Himalayas, Rockies, Alps, and so on, then moved on to a blank world map with country outlines. Kids learned the names of five key countries per continent before moving on to a United States map to learn all the states and finally a map of Alaska, from which they learned major cities and regions talked about by the weatherman.
Once they knew a good number of place names, we started a Map Game that was popular all year long. All place names they knew were on slips of paper in a can. Place names they hadn’t studied were on colored slips of paper in a different can and were worth double points. Kids were divided into teams. A child comes to the front of the room and draws a card (easy or hard, his choice), then has 15 seconds to locate the place on the map. Think about it. You may not be able to draw a map from memory that includes Zambia in the right place, but you know Zambia is in Africa somewhere. You can scan a map and find it pretty quickly.
Some of my kids wanted to learn EVERYthing on the maps and spent spare time playing the Map Game with each other. They were allowed to add additional cards if they wanted.
In a home school situation, moms sometimes put a world map under a clear plastic tablecloth, give each child cards with names appropriate for their ages, and have them work as fast as they can to put as many cards in the right places as they can. There are lots of ways to play the map game, and lots of ways to spin from maps into learning about people and places.
4. Category
I already talked about color-coding school subjects.
Another way to use category is to have kids memorize basic categories in any area of study to use as “file folder” labels in their mental filing cabinet. For example, the three types of rock: igneous, sedimentary and metamorphic; or the four types of clouds: cirrus, stratus, cumulus and nimbus.
 The Facts Game is a way to review and reinforce what they’ve learned anytime in the past. You don’t want kids to think that once they pass a test, they can “delete” everything they learned to date and move on to something else. Hold them accountable for remembering the most important facts and concepts they’ve learned for the rest of their lives. Be sure to incorporate some type of mixed and extended review. The Facts Game is one way to do that.
I wrote 100 questions I want all kids to be able to answer from memory, things like, At what temperature does water freeze? Who is the president? What are the three parts of an atom? How many inches are in a foot?
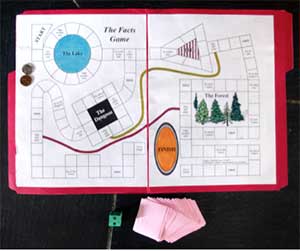
I had kids design their own games and the picture shows a board game some of my students designed. Other teams used other formats, such as quiz show games. You can use any game format or game board you like, with the variation that each child has to draw a card and answer a question before taking his turn.
Just an aside here. One mom told me that the great idea she planned to take home and use was the idea of putting games like this in file folders like rather than on poster board so they’d fold up and easily store. If you finish this workshop with ONE idea you actually use, whatever it might be, your taking an hour to listen to me will have been worthwhile. Hopefully, you’ll find more than one thing you like, but I can’t even tell you how many classes I’ve attended from which I got nothing useful at all.
Back to the Facts Game.
As I said, you can use any game board or game format. I prepared 100 cards asking for basic information kids should memorize. They’re in the Facts Plus Activity Book, but, of course, you can write your own.
Add new cards to the stack as you teach. Especially add categories kids need to commit to memory. The parts of an atom, the primary colors, whatever.
If you’re a homeschool parent and you have kids of several ages, color code cards so that each child has her own stack, reflecting what she personally has learned. Pull cards once they become “really easy” for a child and add new, harder ones, but keep the old cards and add them back in once in awhile to keep kids sharp.
One mom told me she ended every week with the Facts Game. Her kids loved it so it was a reward for them, and she could be confident they were reviewing and remembering what they had learned that week and in the past. You might want to number cards and provide an answer sheet in case someone’s mind goes blank and they need review. Kids can separate out cards they miss and you can address them in review the next week.
5. Continuum
Continuum has to do with math. I posted a number line from 1 to 1000. There are lots of ways to work math into all areas of the curriculum using almanacs and other reference resources. Facts Plus, for example, can be a source of numbers kids can use to write their own word problems.
General Activities
I want to show you a few other activities I used to teach kids how to use reference books.
Scavenger Hunt. This is a “scavenger hunt” with questions such as “Find the name of a famous tunnel in Japan.” Kids go to the index, find either “Japan” or “tunnel”, find the chart of famous tunnels and write an answer. Some questions can have more than one correct answer.
At the bottom are challenge questions for speedy kids. I have to tell you one little story about one of the challenge questions. The question was, “Find the name of a president who died in office.” Kids were supposed to find the chart of presidents and eliminate any who lived beyond their term of office. One child came up in exasperation and said, “I know President Kennedy died, but he wasn’t in his office!” I laughed and changed the phrasing of the question to make it more clear. It’s now “Find a president who died during his term of office.” Kids can be your best teachers.
Perpetual Calendar. This worksheet gives kids practice in using a perpetual calendar. There are only 14 possible calendars, seven for regular years and seven for leap years. When you know which calendar goes with which year, you can figure out on what day of the week something happened. Kids like figuring out on which day of the week they were born, for example. I loved the perpetual calendar when I was a kid. In this activity, they use the index in Facts Plus to look up when things happened, then refer to the perpetual calendar to find the day of the week.
Crossword Puzzle. Here’s a crossword puzzle. Same idea. Kids use the index to find answers to the questions in order to complete the crossword.
On this Day in History. When people first open the Facts Plus Activity Book, most turn directly to pages that look like this and wonder what’s up? As a general rule, from anywhere you open the Activity Book, page backward to find pages with directions for the activity. Those pages have dark black headers.
In this case, there’s a question relating to each day of the year. The answers can all be found in Facts Plus. I tried to choose the most interesting thing that happened that day so kids would hopefully become interested and want to learn more.
I made a different colored set of cards for each month. Obviously, you can give kids a question to answer each day, but another way to use these cards is to play a variation of Bingo using pages from an old calendar. Kids playing the game each draw a card for a day of that month, look up the answer in Facts Plus, note the answer (on a piece of paper or on the calendar itself) and put an X on the day using a colored marker (different colors for different kids). Then take another card and continue. The first person with four X’s in a row wins.
Solar System
Now let’s think back to Calvin and discuss how to answer some of the great questions he asked his dad.
Usually I start each school year with a mini-unit on space, just because it’s fun and it “wows” kids. I’ll talk through the points on the slide.
Before beginning any unit of study, it’s a good idea to have the kids brainstorm what they already know about the subject and what questions they have. You might list what they know and what they want to know on a big piece of paper that you can post while kids study that unit or fold up and take out afterward to see if there’s anything they wanted to know that wasn’t covered.
Of course, some things they think they know aren’t true. List them anyway and see if they find out something different during the course of study. For a long time, everybody “knew” the earth was flat, but it never was actually flat.
Secondly, I teach them how to do research and read a chart.
Next they made their own solar systems using templates. You can do this with the page in your handout. Make three copies of the master for each child, one for Jupiter, one for Saturn, and one for the rest of the planets.
Have the kids look up the planets and color them so they look sort of like the pictures of them. Be sure to put a big red spot on Jupiter, for example. Then cut out the planets and put them in order on a long black piece of butcher paper. Color first, then cut!
Next I had them find more information on each planet. I finished with a bang by showing them the size of the sun to scale, then pretended to put the sun in a shrinking machine until it was very small (details on the handout) and took everybody outside to pace out the distance between the planets on that scale. It was mind-blowing and the kids loved it.
Here’s a copy of the Facts Plus chart on the planets, from page 15. To start with, I’d ask questions such as, How many moons does Saturn have? (25) How far from the sun is Mercury? (36 million miles) How fast does Uranus travel in its orbit? (4 miles per second) and so on.
After they did well with that, I’d ask questions that required comparison. Which planet is furthest from the sun? Which planet is largest? Which planet has the highest temperature? Which planet has the shortest day? And so on.
Now one for grownups, “Which planet has a day that is longer than its year?” (Pause.) It’s Venus, which has a day lasting 243 earth days and a year lasting only 225 earth days. Venus actually rotates backwards.
You can probably tell that I think facts are fun.
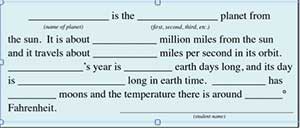 Each child gets a card with a planet’s name written on it to fill out. Those who finish first can do another card. Once everyone is done filling in the information, they copy the paragraph in their best handwriting onto an index card. I choose the best of the cards for each planet and make a hall display with someone’s paper “solar system” and a card for each planet.
I finished the mini-unit by asking kids how big they think the sun is if the planets are the size of the cutouts? I actually made a 6’ diameter “sun” with yellow paper, but one could use chalk to draw one on concrete or show a picture like this. Notice that in the photo above you can barely see the earth, it’s so small.
Then we “shrink” the sun as I mentioned before and we go outside to pace the distance between the sun and the planets. It might help to put up stakes or use chalk on a sidewalk to show distances. There is a whole lot of space in space!
Inventions
Here's an activity I used to guide my kids into higher-level thinking.
- Each student researches dates for a series of related inventions (transportation, communication, medicine, etc.).
- Place the inventions on vertical time lines according to category.
- Hang the time lines side by side and look for patterns within and between the time lines.
Here’s a list of inventions relating to transportation. The child looks up the year each thing was invented.
Next, they make a long vertical timeline and place inventions on it next to the year they were invented. The two time lines shown here are clothing and transportation.
You can use the master in your handout to make timelines, or tape together masters from the Facts Plus Activity Book that have dates already on them.
Finally, have the kids try to find inventions that led to other inventions. For example, the bicycle preceded the motorcycle. The internal combustion engine preceded the automobile. Look for relationships within the timeline.
A really nice thing about vertical time lines is you can hang them side by side on a wall as shown in this photo, and look for relationships across time lines. The modern steam engine, for example, shows up on both clothing and transportation time lines, and inventions based upon that appear in both time lines.
One home school mom love the idea of vertical time lines. She had a lot of kids and they’d been adding things to a time line that stretched around the kitchen for years, so many things that it had become illegible. She went home and had kids categories what was on the time line: European history, United States history, science, etc. The kids then made vertical time lines that took up a wall in a hall.
One suggestion: You can use medium-sized colored Post It notes for labels. That way you can later move, remove, recategorize or reorganize them. Cut off all but the part with the glue, write on it, and slap it up. That way you won’t have to worry too much about mistakes or overloading time lines so they become too hard to read.
Use as many vertical time lines, side by side, as you want. You can make a time line for books you read and another for movies you watch. Be creative. Time lines are a great way to help kids organize the information they are learning and put it into context.
Country Graphs
Now on to place. I remember the first time I had 6th graders do country reports. The librarian had come to my classroom every day for a couple of weeks to introduce kids to a variety of reference resources, but the first day we all went to the library, they were lost. Every hand was up. Both the librarian and I ran ourselves ragged trying to answer the most elementary questions on things we thought they already knew!
Obviously, it seemed to me, they needed more hands-on experience with reference books in a more controlled situation. They needed more early success to be ready to work independently.
So I bought a class set of World Almanacs and made a chart for each continent. Each child filled out one of the charts, then made a corresponding graph. Once that was done, we posted the best example of each graph and made comparisons. Kids were amazed to compare population densities of different continents, for example. Questions started flowing about why things are the way they are. Why is one country is so different than another? By the time I turned kids loose in the library they were raring to go.
Using the graphs, I had the kids look for patterns. Are there correlations (countries high in one area tending to be high in another) or reverse correlations (countries high in one area tending to be low in another)? Can you think of a reason why it might be that way? Kids came up with hypotheses on why things might be the way they are and then eagerly sought information to check their hypotheses.
I generally stopped right there, but you can go on to have kids color maps to illustrate statistical patterns if you like.
Here’s a chart for South America (Facts Plus Activity Book p.135). The countries are listed down the left and the statistical indicators across the top,
- Column 1 is Population Growth Rate: how fast the population is growing
- Population Density: how crowded it is
- Per-Capital GDP: how much money people make on average
- Average Life Expectancy: how long people live on average
- Infant Mortality Rate: how many babies die in their first year of life
Kids use the countries statistics in Facts Plus to fill in the chart. These are South America graphs in the order mentioned above.
This is the graph of Population Growth Rate. I have kids look for the highest and the lowest, as well as see if there are patterns. On this graph, you might notice that the second bar, which is red, is the highest. The next to the last one, which is green, is the lowest.
This is Per capital GDP, a number related to how much money people have on average. Again, look for highest and lowest. You might notice that the second one, which is red, is relatively short though not the shortest. The second to last one, a green one, is relatively high but not the highest.
This is infant mortality rate, how many babies die before their first birthday. The red one is the highest and the second to last green one is low but not the lowest.
And this is average life expectancy. The second one, which is red, is relatively low. The green one second to last is relatively high.
The red one has relatively high growth rate, low per capita GDP, high infant mortality rate and low life expectancy. The green one, second to last, has relatively low growth rate, high per capita GDP, low infant mortality rate and high life expectancy. Not knowing which countries those are, which of the two would be the better place to live? Are there correlations or reverse correlations? High infant mortality, for example is correlated to low life expectancy. What factors might make one country healthier or wealthier than another? Check some maps, What differences can you see between the countries?
Hopefully you see you can get kids into higher level thinking without much effort.
Because you’re probably wondering, the one that’s red is Bolivia and the second-to last one that’s green is Uruguay.
Passport Activity
I want to leave you with one last activity that I dreamed up while traveling in Africa. I loved getting my passport stamped. We actually had to go to an American consulate in Africa to get more pages taped in. It wasn’t all border stamps. As we traveled across the Sahara, they recorded our presence and stamped our passports in every little town. If anyone turns up missing, they find the last place they checked in and start a search from there.
While in Luxor, Egypt, I listed all the things we learned that made travel easier and dreamed up this activity. I started it as a class activity and later challenged kids who were interested to work on earning stamps for their passport at home or in class when they finished their assigned work.
We started together, with everyone filling out an application. I have a form in the Facts Plus Activity Book but better yet would be to get a real passport application at the post office and fill it out. I taught kids about time and currency conversion using worksheets that are in the activity book and together we “visited” Mexico by finding answers to a list of questions, which you tailor to the ages and ability levels of your kids.
Then each child got a passport and a special folder. In the folder were charts needed for doing time and currency conversions as well a list of questions and challenges such as, “The best time to call your family at home is 8:00 p.m. their time. What time should you call from your country?” “What countries border this country?” and so on. All the questions on the worksheet can be answered with just the Facts Plus almanac, but I’d encourage you to choose or make up your own questions based on the abilities of your kids and utilizing all the resources they have available. For example, have them find the country on a globe, search for information on the Internet, etc. Maybe start with just a few questions and add a question for each new country to ensure early success. Be creative.
When kids complete the activity, they get a stamp or sticker in their passport and can color in the country on the map inside their folder.
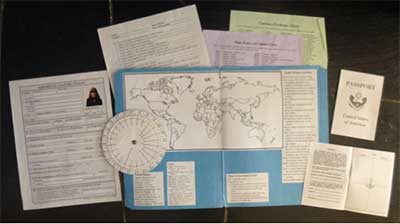 Here’s how it looks. The passport application is on the left, The circle thing is what kids use to do time conversions. The folder has a world map taped inside and statistical information for the United States and the child’s state to compare with the country being investigated (thereby incorporating math calculations).
Some kids loved this activity and traveled the world. Others weren’t as interested as their teachers or parents. And that’s the way it is with teaching. Part of the art of teaching is to try different things and keep trying. Find what gets kids excited, and roll with that. Use their interests like wind in your sails. Sometimes you have to beat against the wind because they need to learn things whether they want to or not, but other times their interests can provide enough motive power that you can sit back and just enjoy the ride.
So, to review, these were my objectives. It was my hope that you would:
- Memorize the five basic ways to organize information.
- Learn how to organize a learning environment to capture and exploit “sparks” of student interest.
- Go home with at least one idea you actually use.
See if you can bring back to mind what are the five ways to organize information. If you can’t remember, consider reviewing the workshop.
Think about how you might change your classroom or learning environment so you’re ready to take advantage of great questions or sparks of interest that come your way.
And choose one idea you’re going to actually try with your kids. Let me know how it goes! I love encouraging e-mails!
One thing we talked about earlier is how the amount of information in the world is doubling every five years. It’s like we’re on a treadmill that’s moving faster and faster and faster until we’re hanging on for dear life. For the most part, everyone is too busy to rest, reflect, imagine, or play. Let me suggest, as one last idea, that you schedule time for reflection into your week. Give your kids’ imaginations time to gaze at the clouds and just imagine. You have to push back against the culture to make it happen, but it can make a big difference in the long run for your kids’ ability to think.
When I read this, I couldn’t believe how it described modern life. I mean, Lewis Carroll wrote the book way back in the 1870s. How could he know what we’d be up against today?
Alice and the Queen had been running like mad when Alice discovered they were still under the very same tree. “Why, I do believe we’ve been under this tree all the time! Everything’s just as it was.”
“Of course it is,” said the Queen. “What would you have it?”
“Well, in our country,” said Alice, still panting a little, “you’d generally get to somewhere else—if you ran very fast for a very long time as we’ve been doing."
"A slow sort of country!" said the Queen. "Now, here, you see, it takes all the running you can do just to keep in the same place. If you want to get somewhere else, you must run at least twice as fast!"
With that I leave you, hoping you’re now better equipped to nurture your kids excitement of learning, build confidence through early success and build a framework of knowledge and skills to which they can connect new learning throughout their lives.
Source: www.SusanCAnthony.com, ©Susan C. Anthony